Download and Install
From the download section on the homepage, choose to install via Google Play or download and install from the official download page.
Add Configuration
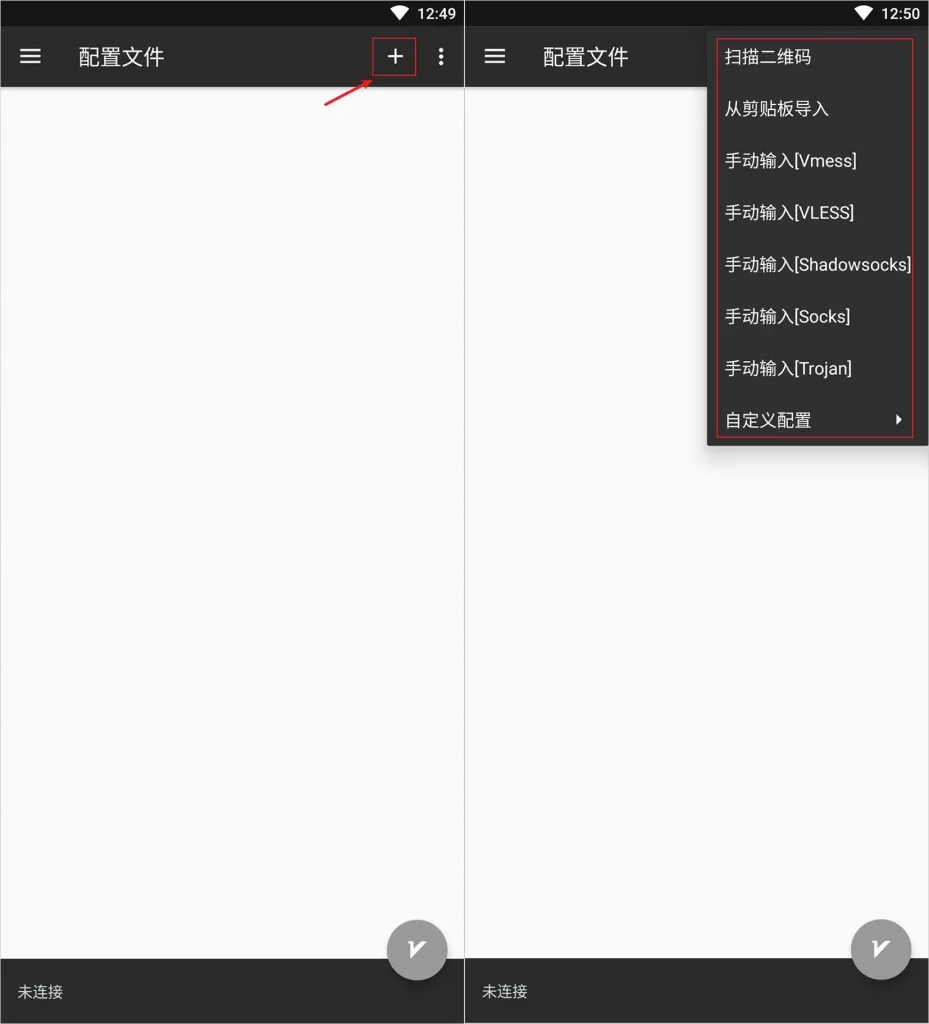
Open the v2rayNG app and click the ‘+’ button in the top-right corner of the interface to choose how to add a configuration. You can add servers by scanning a QR code, importing from the clipboard, or entering information manually.
Next, we will introduce each of these addition methods in detail.
Scan QR Code
First, open the QR code image of the node on your computer, or save the QR code to your phone. Next, open the v2rayNG app and click the ‘+’ icon in the top right corner, then select the ‘Scan QR Code’ option. You can scan the QR code directly from your computer screen using your phone, or choose a QR code image from your phone’s photo gallery to scan. This allows you to easily import node information.
Import from Clipboard
First, you need to copy the link address of your node server. This address varies depending on the protocol, for example, a VMESS server address starts with vmess://, VLESS with vless://, and addresses for Shadowsock, Socks, and Trojan servers start with ss://, socks5://, and trojan:// respectively.
Next, open the v2rayNG app and find the ‘+’ button in the top right corner. Clicking this will bring up options for adding configuration files. At this point, choose ‘Import from Clipboard’ to add the server information you just copied.
Manual Entry
You can also choose to manually configure protocols such as Vmess, VLESS, Shadowsocks, Socks, and Trojan. Click on the ‘+’ icon in the top right corner and select the manual entry option for the corresponding protocol. Then, enter the relevant parameters on the configuration page, which typically include server address, port, encryption method, password, etc. After entering these details, click the ‘Complete’ button in the top right corner to add the proxy server.
Add Subscription
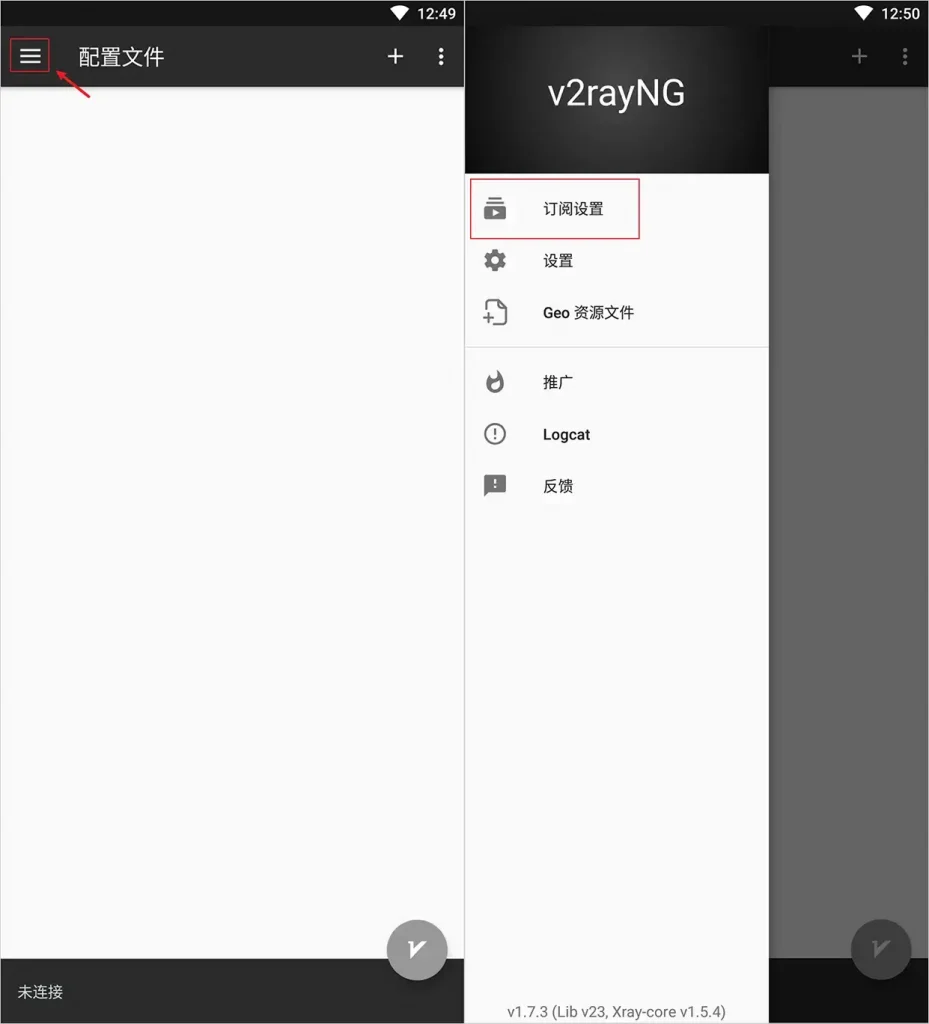
v2rayNG allows you to add nodes directly through airport subscription links. The process is super simple. Just click on the menu button in the top-left corner of the app’s main interface, then find ‘Subscription Settings’ to add your subscription link. Effortlessly done in just a few steps!
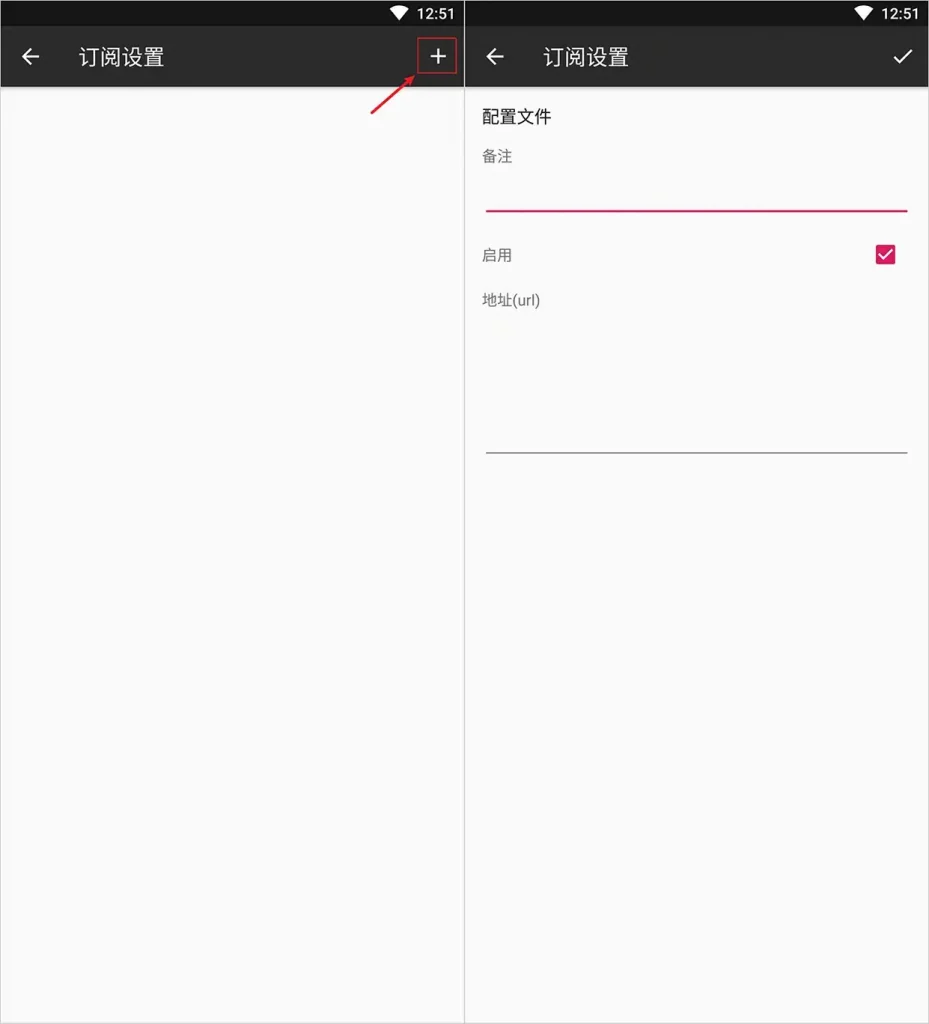
When you open the subscription settings interface in v2rayNG, you’ll see a ‘+’ icon in the top right corner. Click this button to enter the page for adding a subscription. Here, you can write anything in the remarks column to help distinguish different subscription nodes. Next, enter your subscription address in the address (URL) field. Finally, click the ‘Complete’ button in the top right corner, and your subscription address will be added.
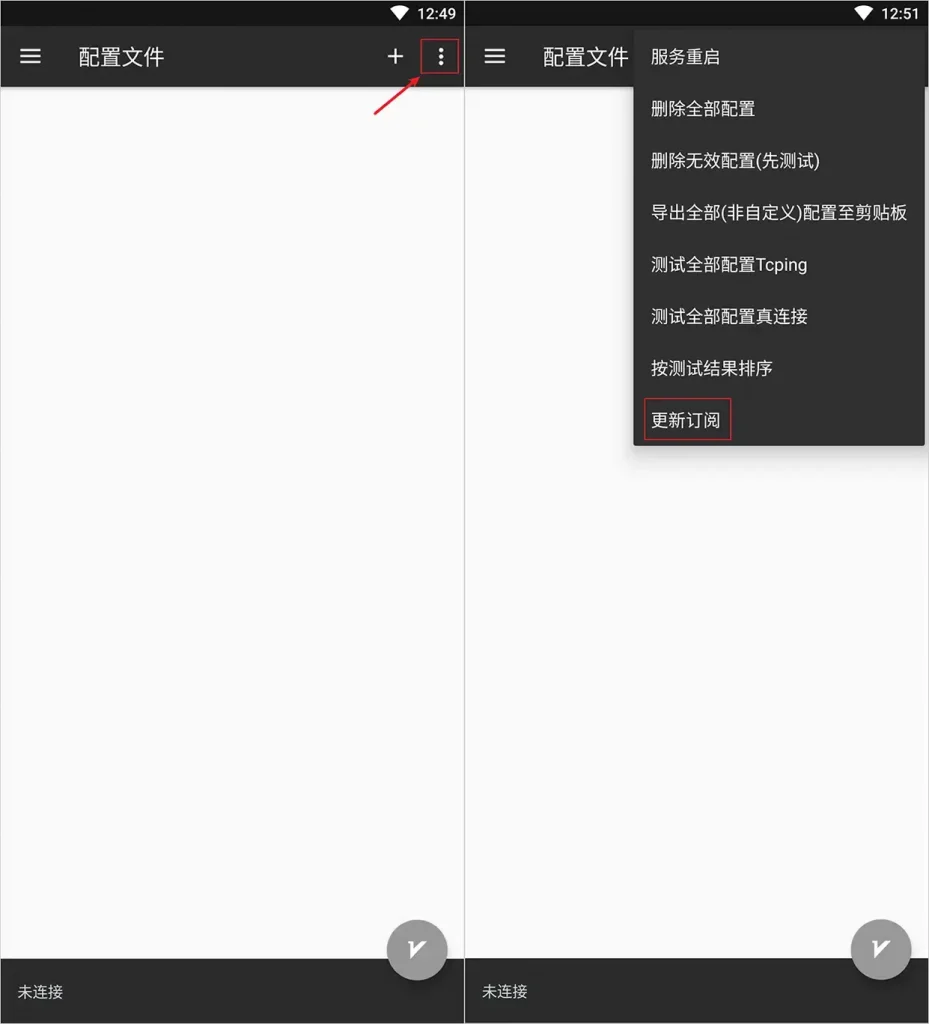
After completing the previous steps, the final step is also crucial. Go back to the subscription interface in v2rayNG, click the menu button in the top right corner, and in the pop-up menu, select ‘Update Subscription.’ This will synchronize the latest node information. This step is very important, so don’t forget it!
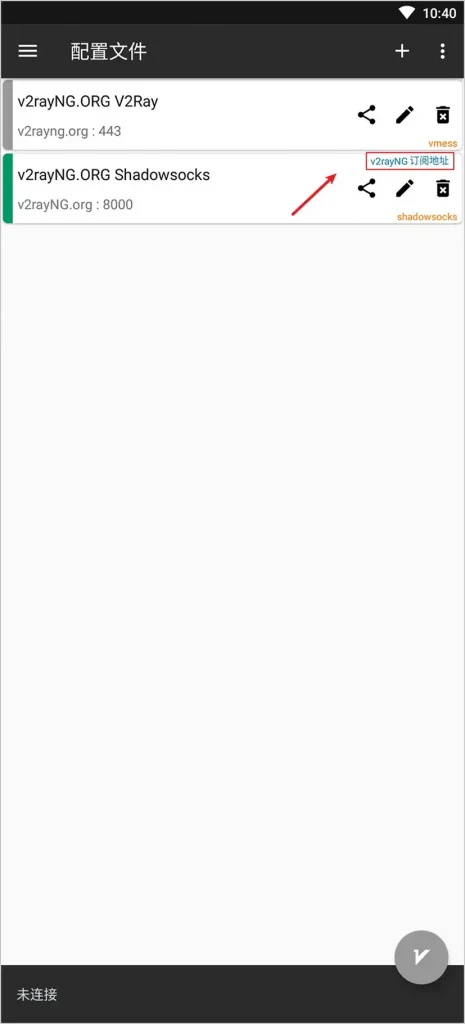
Now that you have successfully added proxy servers through the subscription address, you will notice in the v2rayNG node list that each server added via subscription has a small remark next to it, displaying the content you entered during the subscription addition. This makes it easy to distinguish between different nodes. It’s as clear as shown in the illustration below, straightforward at a glance.
Start Proxy Service
In the list on the main interface, you can see all the proxy servers you have manually added or added through subscription settings. Each proxy server is accompanied by a vertical line indicating its status. If it’s gray, it means this server is currently not selected; if it turns green, this indicates you’ve already selected this server.
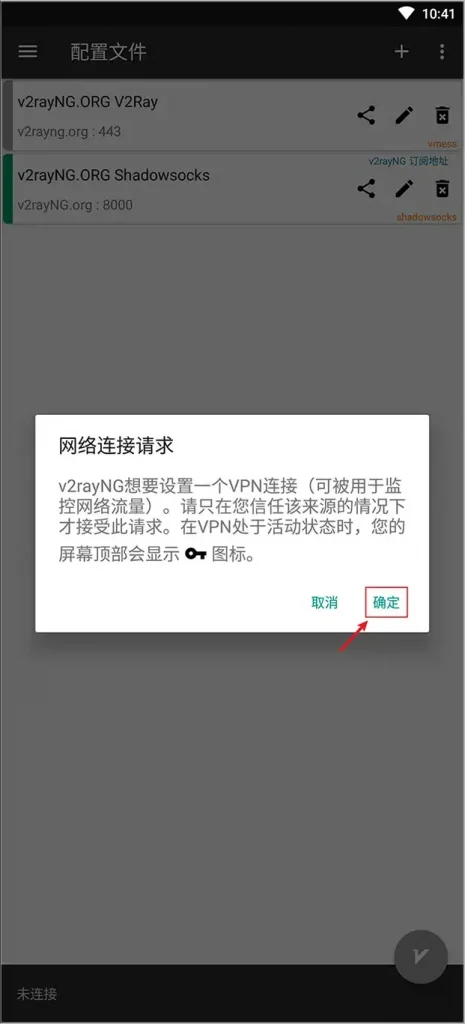
Once you’ve chosen a server, you can click on the V-shaped icon located at the bottom-right of the interface to start. If you are setting up for the first time, the system might pop up a prompt asking for proxy creation, in other words, a network connection request. Simply click ‘OK’ to start the proxy.
Sharing Proxy Servers
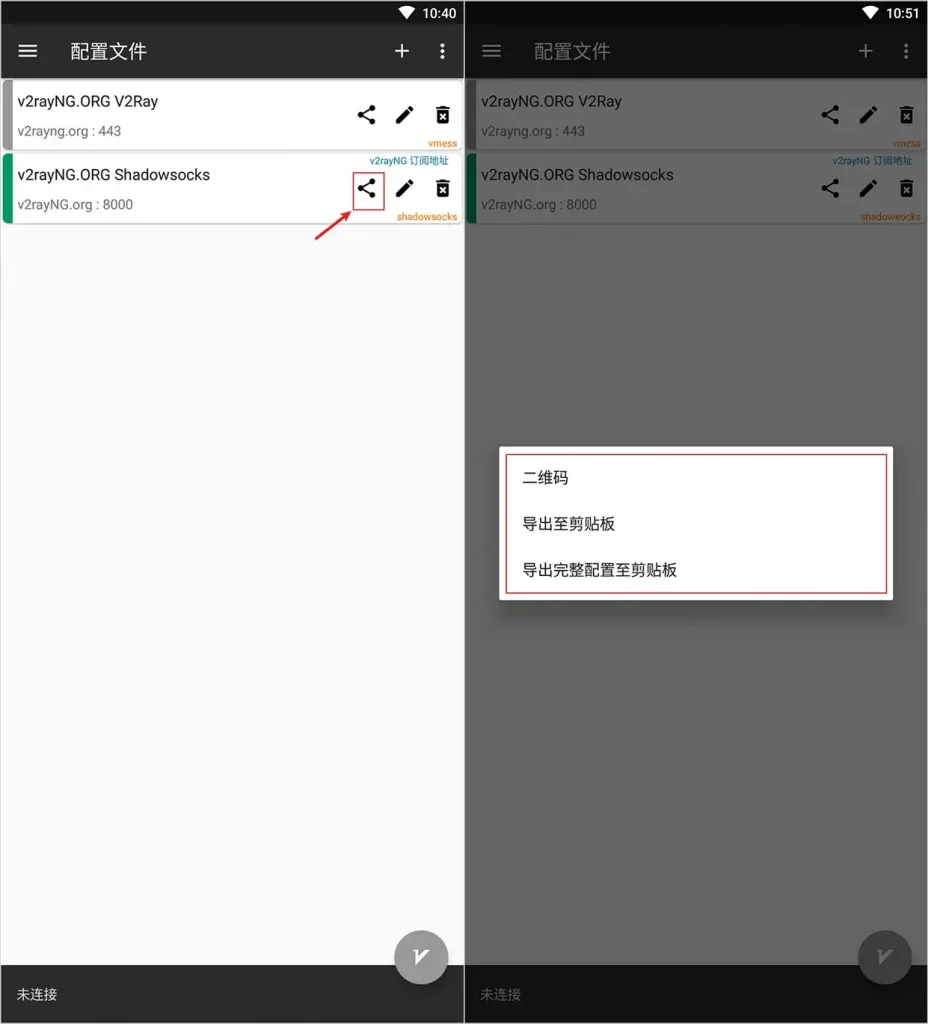
You can also share your proxy server nodes. In v2rayNG, simply click on the icon of the node you want to share, and you can choose to generate a QR code or export the configuration to the clipboard for easy sharing with your friends. Then, use the scan QR code function or import from clipboard feature discussed earlier to add this node server. This function is quite practical and the operation is very straightforward.
Setting Routing Rules
For novice users of v2rayNG, the pre-defined rules in the system are a good choice as they already incorporate a variety of routing rules suitable for different needs. These predefined rules include:
- Global proxy
- Bypassing the LAN address then proxy
- Bypass mainland address then proxy
- Bypassing LAN and mainland address then proxy
- Global direct
You can select the appropriate rules according to your needs. Usually, “Bypassing LAN and mainland address then proxy” is a very practical choice, as it can avoid using a proxy when accessing domestic websites, and automatically enable the proxy when accessing international websites, meeting the requirements of most processes of surfing the internet in a scientific way.